Triggers are a powerful tool within myhrtoolkit that enable a Controller to set up notifications and emails to be sent when certain sickness absence conditions are met.
Trigger points can be used to highlight behaviour patterns. They are particularly useful in the monitoring of sickness absence, allowing managers quick insight into situations which require further attention.
Search for the Triggers setting in Config > System > Triggers.
The wonderful thing about Triggers
There are currently three types of Trigger, all of which apply to absence:
-
Instances
-
Days
When an aspect of an employee’s absence passes a selected threshold within a given time period, the myhrtoolkit system will notify the relevant absence manager via their notification area, or email, depending on selected options.
Creating a Trigger
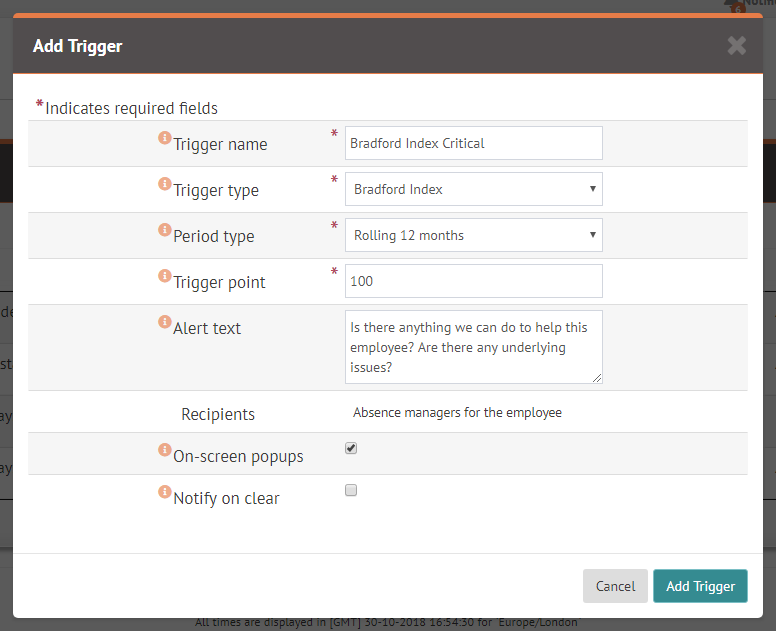
Triggers are created from within the Config area, using the Add Trigger button.
In addition to the detail here, most fields have popovers for a quick explanation.
-
Trigger Name
-
Give the trigger a distinguishing name, just to aid your own management, especially if many are set up.
-
Trigger Type
-
Triggers can have one of the following types.
-
Instances – triggering based on the number of times a user has been absent, regardless of the number of days
-
Days – triggering based on the number of days a user has been absent, regardless of the number of instances of absence
-
Bradford index – triggering based on the Bradford Factor calculation derived from a combination of days and instances
-
-
Period Type
-
Triggers can be set to calculate on a:
-
Rolling 12 months
-
Year To Date
Selecting ‘Year To Date’ uses a fixed date as a basis from which a year is measured. e.g. 1st January for a calendar year, 6th April for tax year. The basis date can be set differently for each Trigger using the Year To Date option.
-
-
Trigger point
-
This is a numeric field indicating the minimum level at which the trigger is activated.
-
Alert Text
-
This is an optional text field. Any text recorded here will be appended to the notification sent out when a trigger is activated.
-
On-screen popups
-
This is a toggle for whether to display a pop-up notification at the point of triggering a trigger (eg. when a manager adds an absence). This will only show to the user who caused the trigger IF they are typically one of the notification recipients.
-
Notify on Clear
-
This is a toggle for whether to notify when an employee falls back below the trigger point level.
Recipients
Currently, only absence managers can be recipients. This means the User will not have any options for recipients but future versions will be able to incorporate different recipient groups. Employees will not be notified if they have activated a trigger
Activating a Trigger
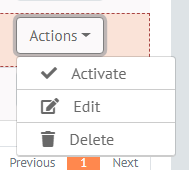
Once created, a Trigger is initially inactive and will need to be activated. This is achieved using the menu on the button to the right of the trigger.
Note – when activated, a check is run on current users against the trigger point condition specified. Notifications will be sent to the relevant absence managers if any of their staff have already exceeded a trigger point.
Editing a Trigger
If a Trigger needs updating, use the option on the menu button to the right of the relevant trigger. A form similar to the one used for creating the trigger will appear.
If you need to edit a trigger that has been activated, editing is limited to the following fields
- Trigger Name
- Alert Text
- On-screen popups
- Notify on clear
Reporting
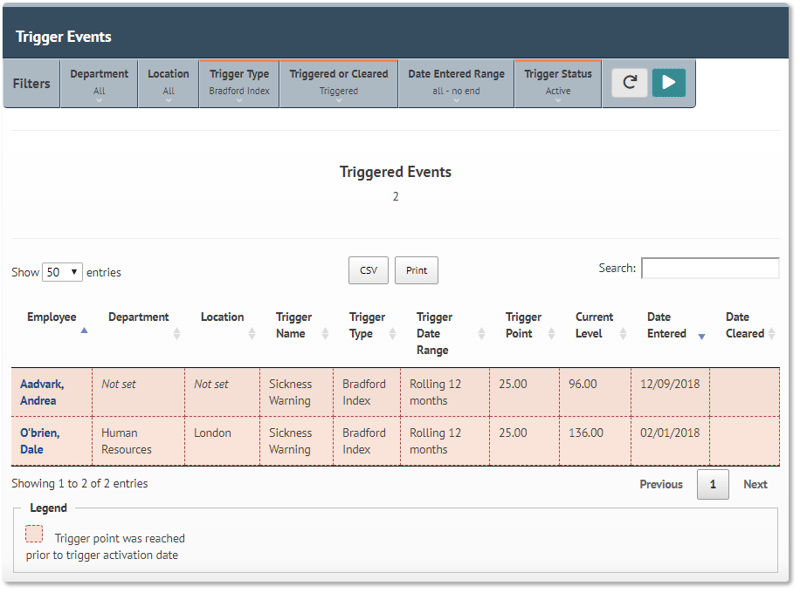
Trigger points reporting can be found via Management > Reports > Triggers.
The report is highly configurable with filters for all the relevant fields, and has a CSV export for use in third party applications.
Notes on Calculations
Internally, absence instances are recorded against the first day of absence with a record of the number of days of absence. So an absence started on 31st Jan and concluding on 2nd Feb will be recorded as 3 days in January. For further notes on absence, see this page.


 Holiday Planner
 Absence Management
 Performance Management
 Staff Management
 Document Management
 Reporting
 Health and Safety Management
 Task Management
 Security Centre
 Self Service
 Mobile


