This guide will help in navigating the process by which new employees are added to myhrtoolkit, and how new starters accounts are processed.

When a new employee starts, they can be brought into your myhrtoolkit HR system by starting the New employee wizard from the Management toolbar.
The wizard will walk you through the stages of setting up the new starter.
With each page mandatory fields are marked with a ‘*’, all others are optional and can be updated later via other settings pages around the system.
Some pages have a button to allow you to skip the current step. The information contained on the page can be updated elsewhere in the system at a later date.
At any point during the wizard, you can save your position and return to it later.
Note – Only what has been submitted up to that point will be saved, so any new data on the current page will not be saved. To resume the wizard, an entry is created at the bottom of your Management message board.
Various pages will have options which require further confirmation. The confirmation(s) will be presented after submitting the page.
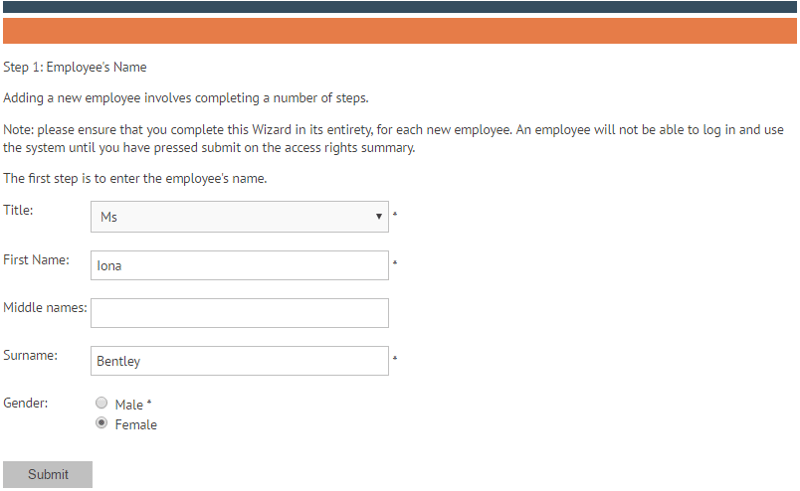
When each page has been filled, clicking submit will move to the section.
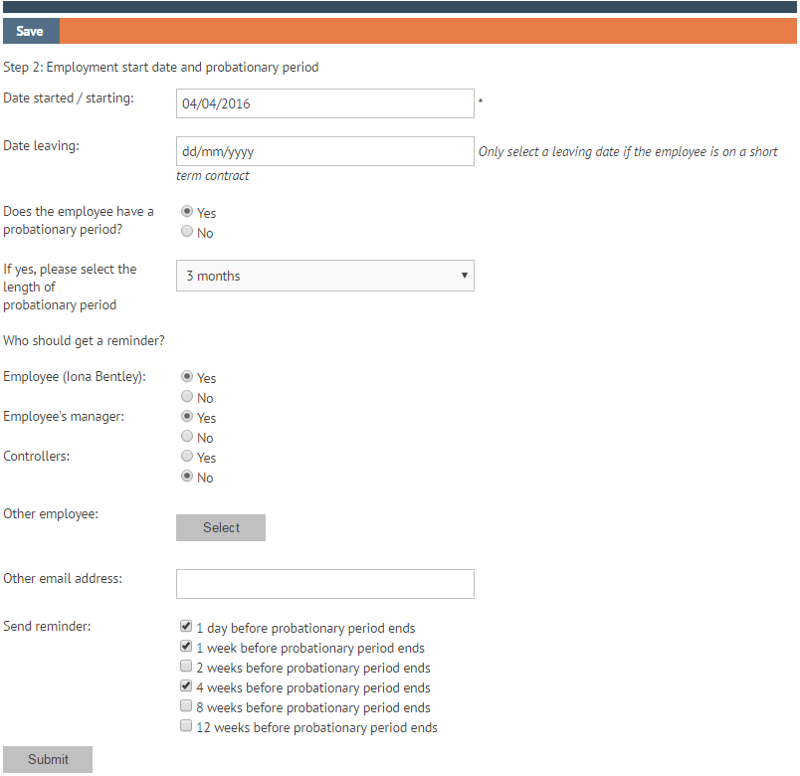
The second page relates to standard starting details for the employee. If a probationary period has been specified here, you will be asked to confirm who will receive an email about when it ends.

At any point in the process you can follow the Save link at the top of the page and the wizard will be paused, to be resumed at a later date (or removed as required).
Step 3 will allow you to specify the employee’s work and personal details. If their specific job title doesn’t exist in the drop-down box, you are able to add a new one using the ‘Add new job title’ button.
Step 4 relates to the employee’s access rights to the system, and is spread over a few pages.
The default setting is that an employee will have access to myhrtoolkit (with their own login name and password). However, there may be cases where you wish to have an employee recorded in the system, but not require them to access the system. We term is a ‘record only’ employee. The first page allows you to make that choice.
The next page relates to Controller access. The default is that the User will not be a Controller. Users should only be set up as such with care, as this option gives them complete access to all other employees' private details and configuration of the whole system.
Page 3 gives you the option to make the new User a Manager. If management access is granted, the User will only be able to see details of employees whom they manage.
The final page is where you assign the new starter to their Manager(s).
The page for Step 5 contains text relating to the ‘system email’ address. This is the email address that is used for notification emails sent by myhrtoolkit.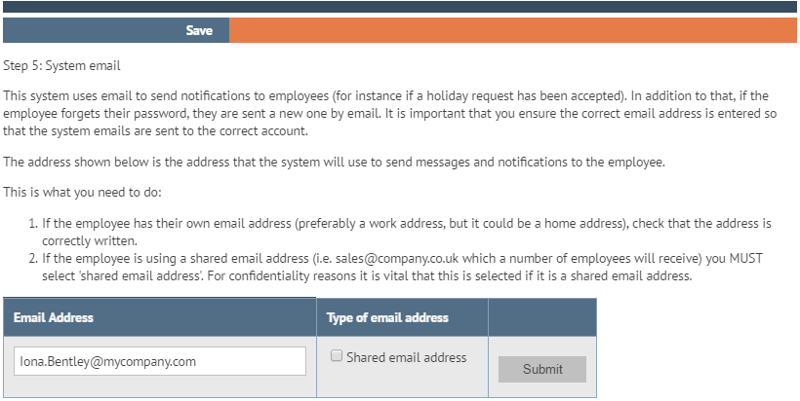
Step 6 allows you to populate the new user’s document library with their contract, CV, etc.; and (in Part 2) give them access to general company documents, such as company handbook.
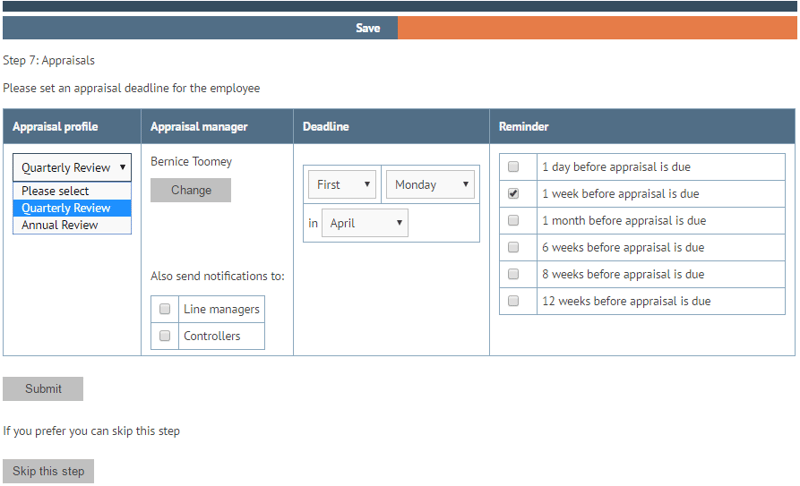
This allows you to assign the New User an appraisal profile and various other options relating to it. The User will then be entered into an appraisal cycle with their Manager (or another manager depending on your organisation’s preferences).
You can configure the Hours Status of the new employee. There is on screen help, and further information can be found in the Hours Status Guide.
It is important to keep an employee's Hours Status up to date to ensure their Holiday Entitlement remains correct.
Holiday settings do not have to be set up here and can be updated at a later time, but it is recommended that they are as it simplifies the User’s experience of the system as they first start to use it.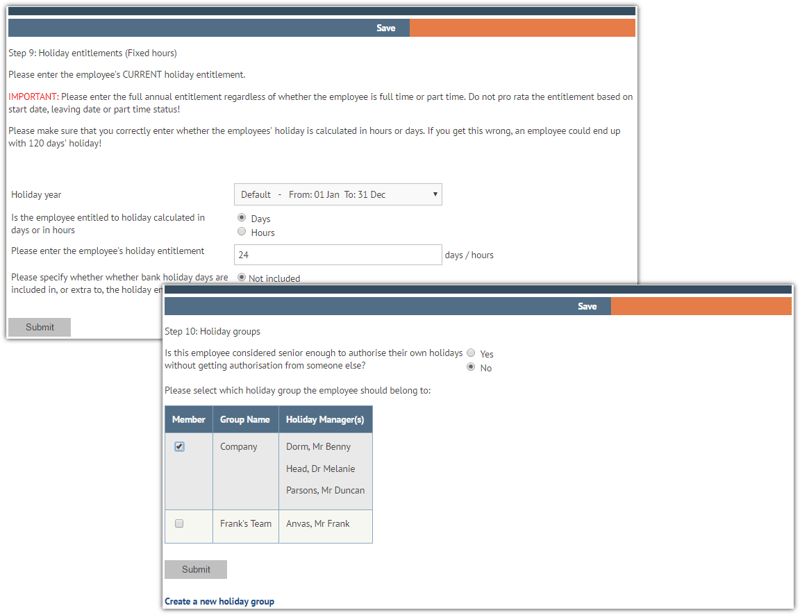
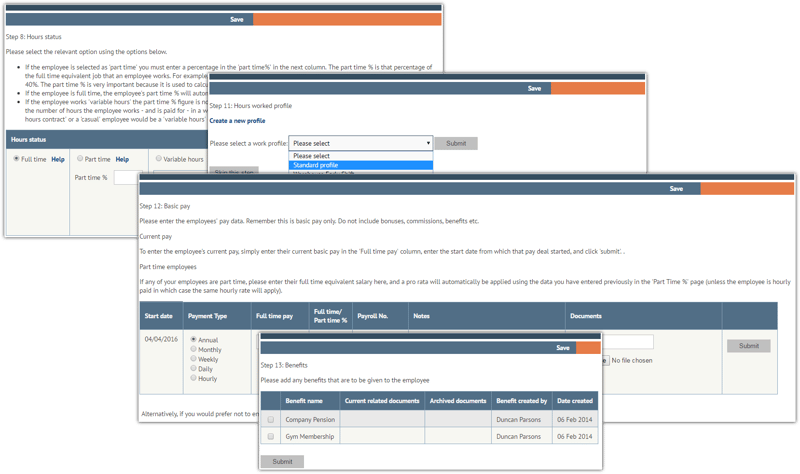
The final steps (11 to 13) are for hours status, pay and benefits. There is text guidance on the pages that need it.
When you have completed filling out the new employee’s details you will be presented with a summary page. If inaccuracies have been put in, following the relevant Amend link will allow you to change that data.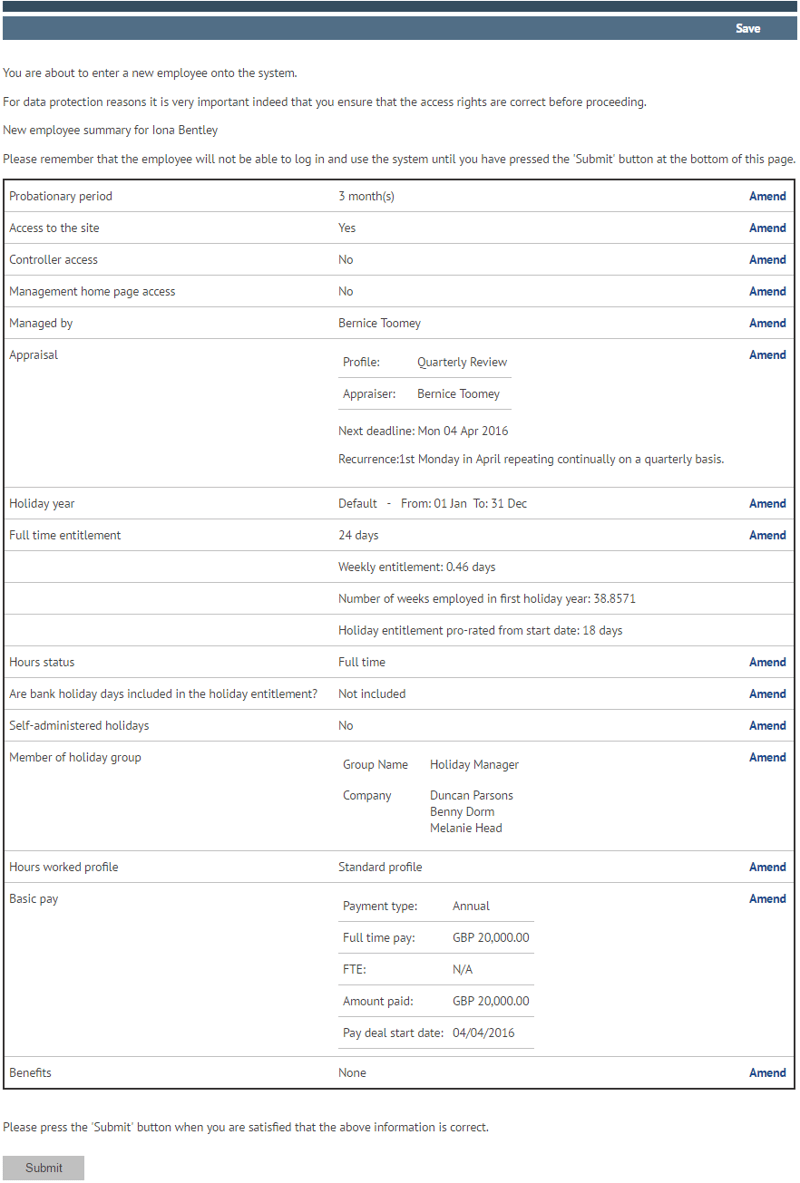
When you are satisfied that all the information is correct and have submitted the page, you must decide how the new login details will get to the User.
myhrtoolkit can email the details directly to them using the specified ‘system email’ address. The User will be sent an encrypted link, which will enable them to set their username and password. The link is time limited, so encourage them to act promptly.
or
you can see the login details yourself and pass them on to the User (during induction etc.).
Depending on how your organisation has configured your system, you may be taken to a final page which gives you the option to alter who the user can see in the employee directory.
Controllers – If in Management > Bulk data > Settings > Employee directory you have chosen Show all, this page will not appear and the new starter will automatically appear in all employees’ directories.
Following the reports icon on the management toolbar, there are two reports which show detail about new starters.
Starters & leavers – shows by name the new starters and employees who have left (excluding deleted employees). This is filterable by calendar year, or by a rolling 12 month window.
Starters analysis – gives raw figures for the number of new employees entered into your myhrtoolkit installation by month and by year.
© 2021 myhrtoolkit Limited, HR software on demand. All rights reserved. Various trademarks held by respective owners.
Unit 18 Jessops Riverside, 800 Brightside Lane, Sheffield S9 2RX